How to travel with a kayakThe world is becoming a smaller place day by day, as more world class paddling destinations are being discovered. It is also becoming easier and easier to get to those places. In this post I will attempt to demystify getting around the world with your kayak. First off understand that traveling with a kayak sucks. I have spent many days wishing I had a fanny pack instead of a kayak, but hey getting there is half the fun. That being said once you are there (where ever there is) things are usually much easier. Like 9 times out of 10...
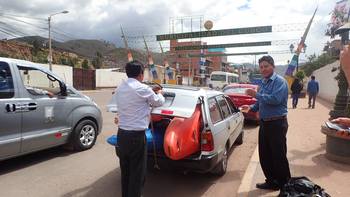
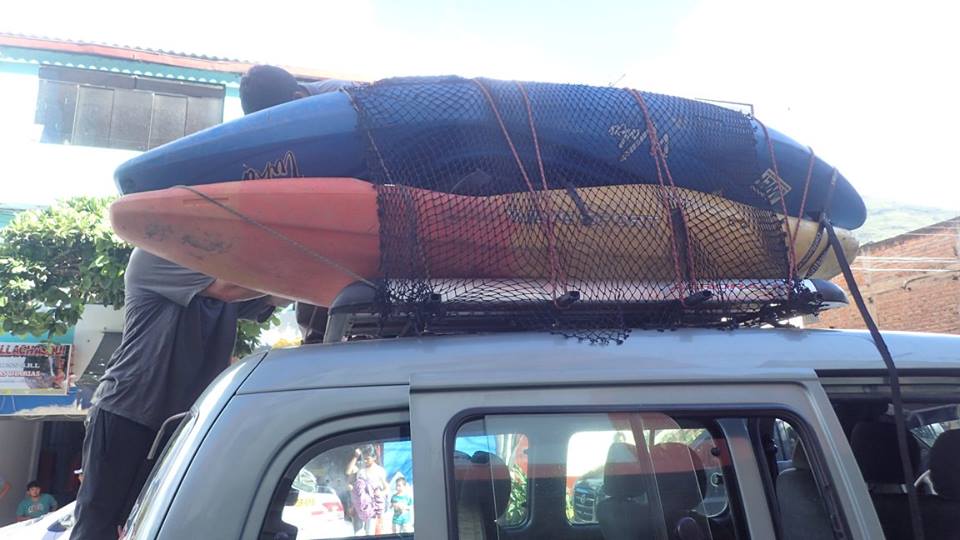
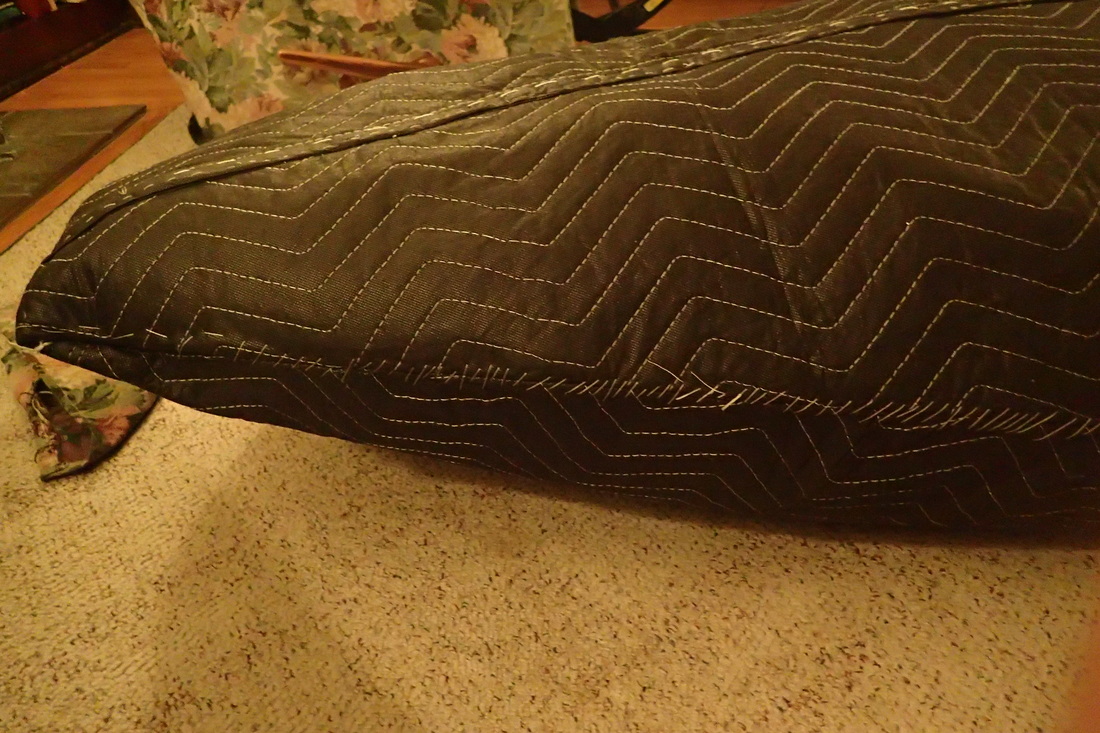
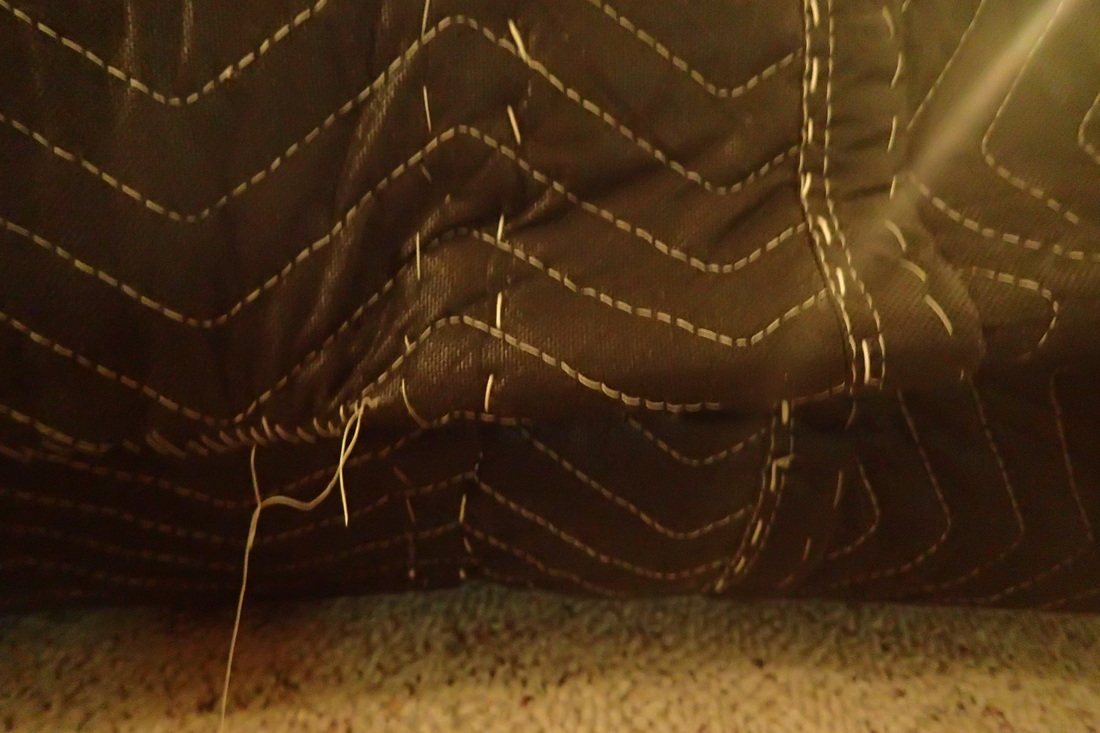
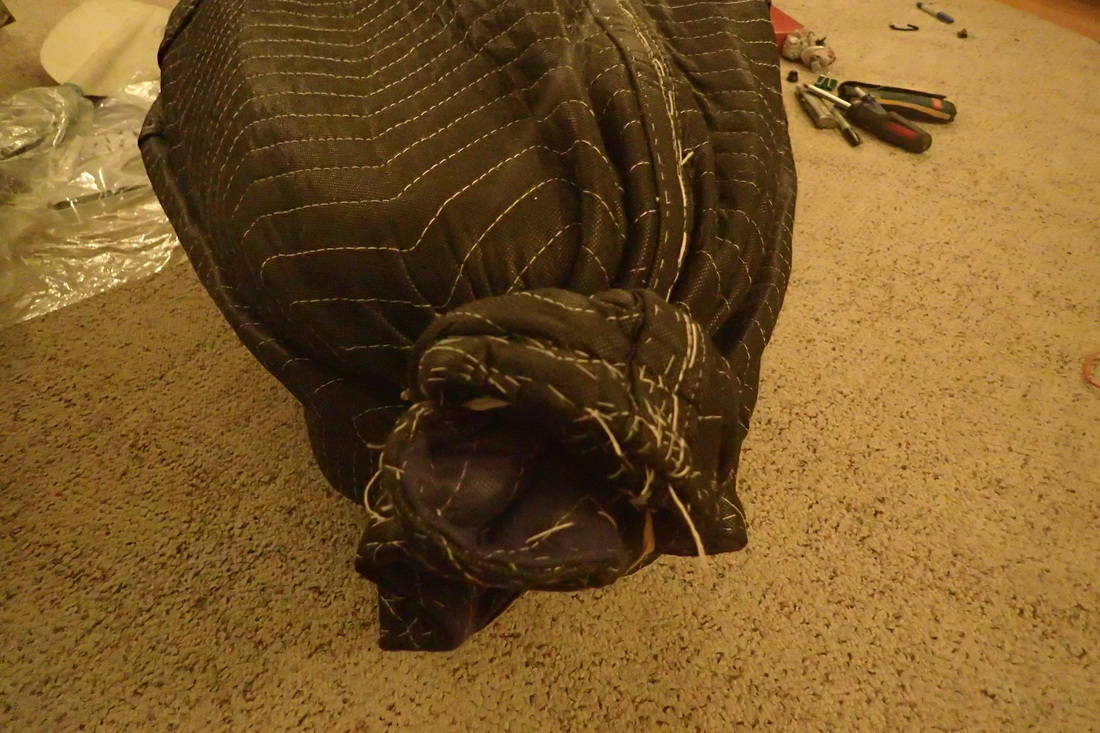
Buses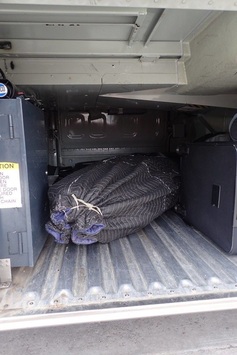 My kayak in a Greyhound bus, plenty of room for more boats. My kayak in a Greyhound bus, plenty of room for more boats. Many times you have to go long distances in between locations; this is when buses come in handy. As with taxis and shuttle vans, many times bus drivers will try and rip you off. They may also not be aware that kayaks can fit inside the bottom. Smile often and show them that they fit, you can fit up to four (maybe 5) creekboats in a large bus storage area. Paying In Canada and the United States Greyhound will charge an arm and a leg for shipping your kayak. But they will ship, it and it dose fit, simply don’t take no as an answer. It may help if your kayak is wrapped in a bag (see further down for instructions). In developing countries the rules change person to person but. If you have purchased your ticket and the driver wants more money it is going into his pocket so, you have several options. Option 1 'play the dumb gringo': act as if you do not understand what he is saying show him your wallet or pocket that is empty. If in a Spanish speaking country say words like: lo Siento (pronounce 'lo si endo' when speaking gringo) and 'no intendo por favor' (pronounce each syllable). A big smile always helps your case. Usually the driver will understand that you don’t have any money and move on. Option 2 'haggle': at some point you will pay for your boat, here are a few things to remember. Never pay more than the price for your ticket, even half is a lot. Lastly if you know you are getting seriously ripped off don’t be afraid to cause a seen or talk to the police. The police are usually on your side because you are a tourist AirplanesNow for the tricky bit, at some point in my life I would love to show up in a country without massive bags and paddles. I think it would be a lot of fun to just have a small knapsack. But then I wouldn’t be kayaking, and where is the fun in that. At this point there are no North American airlines (to my knowledge) that carry kayaks. So you will have to lie and say whatever possible to get your boat on the plane. Don’t fret everything is going to be ok, it is usually then you think. The most important thing is not to mention that your 'kayak' is a 'kayak', say it is windsurfing equipment or a wave ski. Second have all of your information handy, which is: the rules for your 'wave ski', 'windsurfer' ext, your passport and your credit card. It usually goes something like this: Attendant: My God what is that thing? Me: It is a wave ski, here are the rules and regulations Attendant: OK, I am afraid it will cost extra Me: No problem here is my credit card and passport Bing, Bang, Boom, easy... Remember if you have any problems (while staying polite) say whatever you have to, to get it on the plane. Say that you have put it in helicopters, a Cessna or Beaver, whatever. It may be a bit awkward but it will fit. Say that you were in (name of country) and brought it there and it was not a problem. But most importantly remember that you like kayaking, and that it is so much fun. How to build your own kayak bagStep by step instruction on how to build a kayak (wave ski) bag. It can be as simple as wrapping a sheet around your kayak, or a little more professional looking like what I am going to show you. 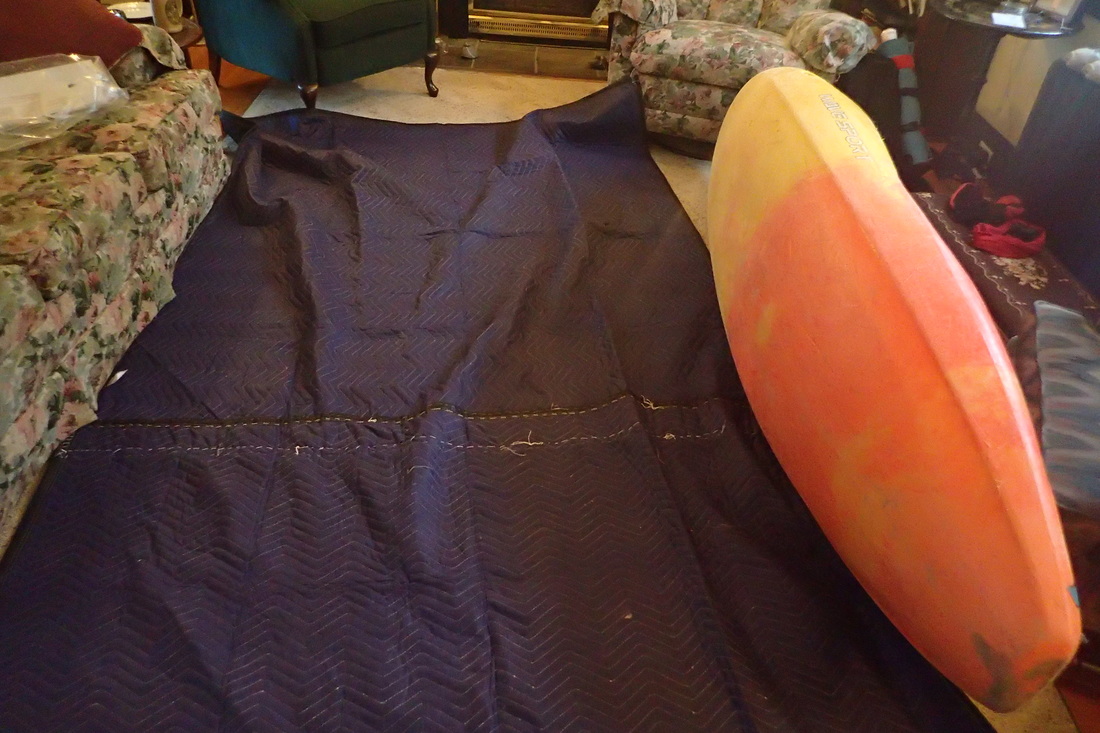 Measure twice, cut once MaterialsKayak Material- moving blanket, sheet, regular blanket ext. scissors (sharp enough to cleanly cut the material you are using) Needles or a sewing machine -one big fatty needle -lots of extra needles -an awl Pins (or extra needles) gloves or thimble thick thread (I used cotton string) measuring tape large clear work space (I used my living room) 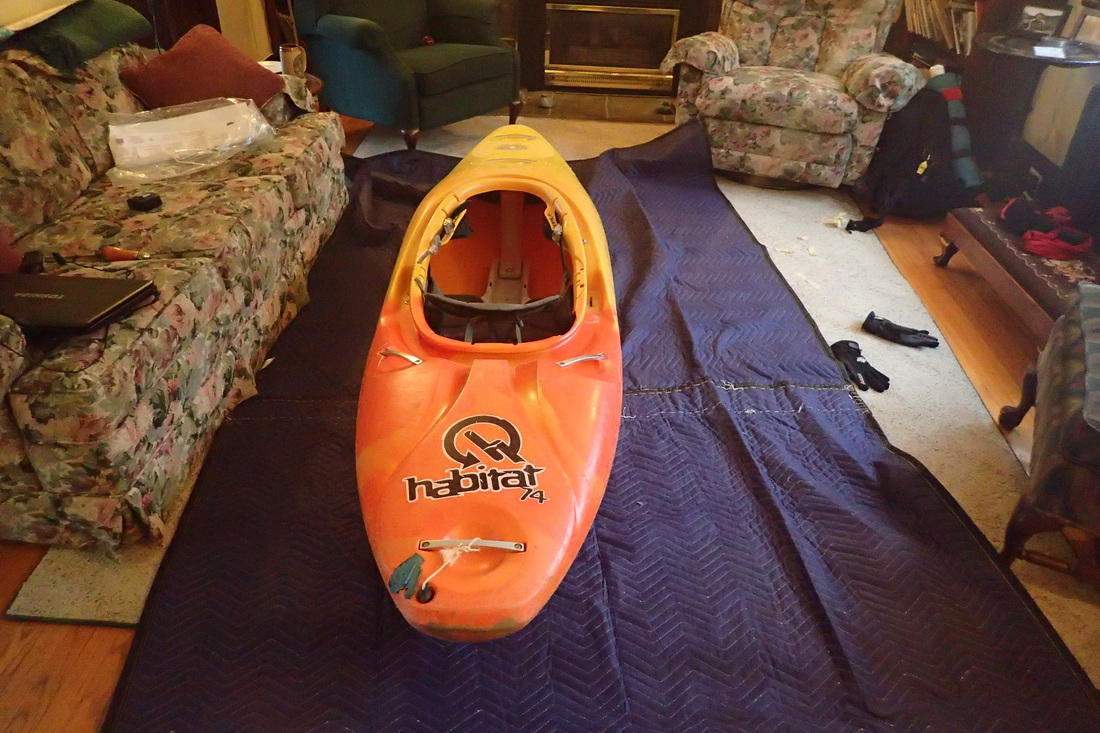 Measure twice cut once Method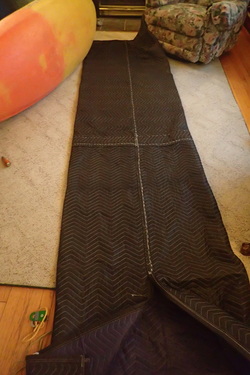 Figure 1: the tube Figure 1: the tube 1) Start by measuring your kayak, take the length and circumference of you boat 2) Add at least 2 to 3 feet of wiggle room on you length and width. I had a peace of matterial that was 10 feet long and 8 feet wide. for a boat that was 8 feet long and 6 feet in circumference at the cockpit. 3) Purchase your material- I used two moving blankets sown together in order to give me the right dimensions. I chose moving blankets because they are durable, big and cheep. As an added bonus they were insulated so I could have used my 'Wave ski' bag as a sleeping bag. However, you can use any material you want -blankets, and sheets are commonly used. 4) Lye your kayak downs on the material, fold the material around the kayak to create a tube (figure 1). Make sure you have at least an inch to 2 inches minimum of overlap, so your seam will be as strong as possible. Pin in place. 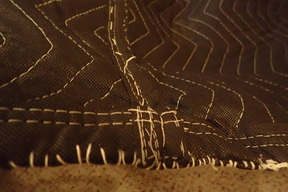 Figure 2: the end of the bag stitched closed. Notice the heavy duty string Figure 2: the end of the bag stitched closed. Notice the heavy duty string 5) Sew both sides together. I used a double stich and doubled line for extra strength. 6) Stitch one end shut (figure 2) 7) Place kayak in bag. It should be tight and very form fitting 8) Pin darts in to the end of the kayak bag, removing the excess material at the end of the bag. To do this, fold the material under itself. Pin in place (figure 3 and figure 4) 9) Repeat on both sides of the 'wave ski' bag (figure 5)
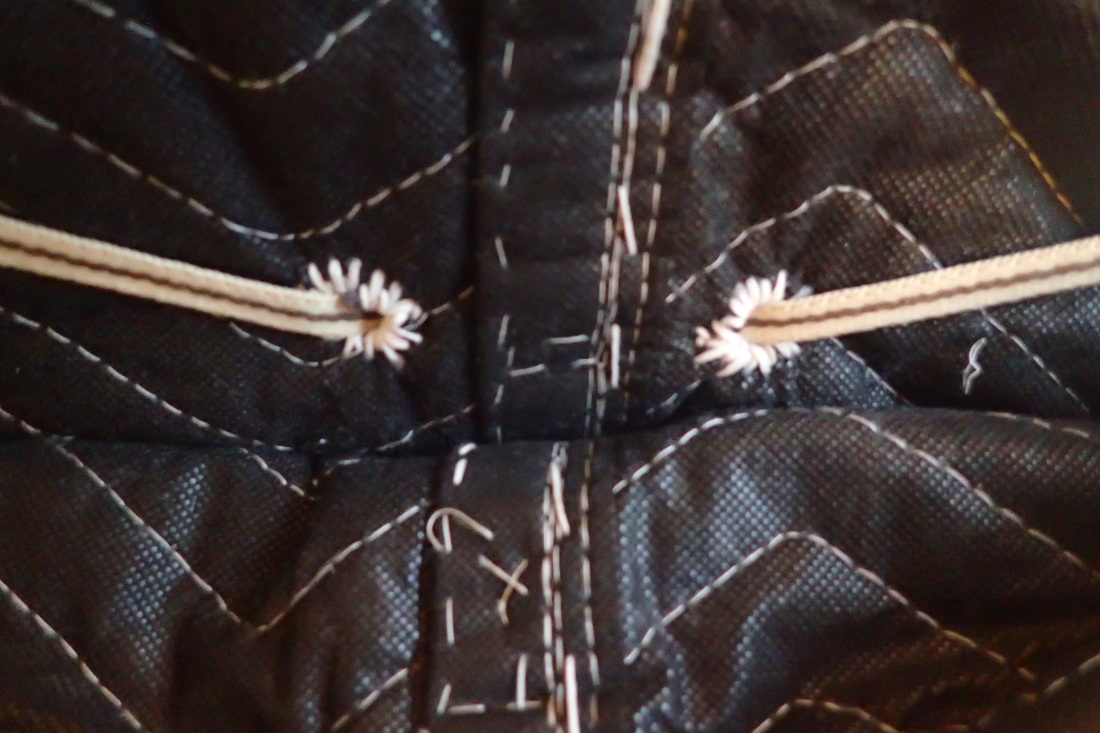
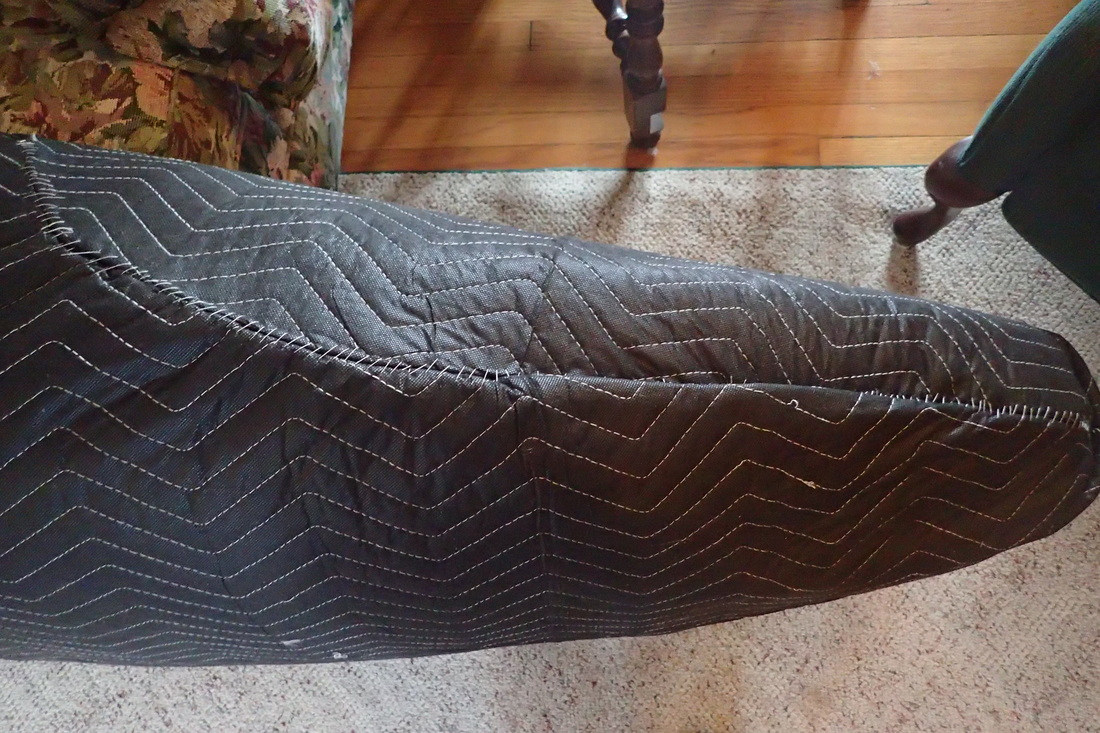 Figure 5: Close up on the end of the 'waveski' bag, and a finished dart. 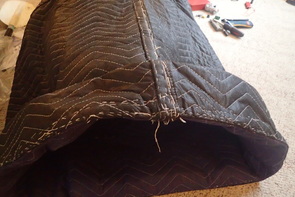 Figure 6: the collar this creats space for a draw string feature to close the bag. Figure 6: the collar this creats space for a draw string feature to close the bag. 10) Measure and remove any excess material, making sure you leave a foot of material after the length of your boat. Example, 8 foot kayak 9 foot bag 11) Fold a 6 inch collar around the open end of the kayak. Pin in place (figure 6) 12) Insert a string (rope, shoe lace ext.) inside the collar. This will become the draw string to close the bag. 13) Add two holes on the inside of the bag for your draw strings to come out. Reinforce these holes with stitching (figure 7) 14) Tie her up pack your bags and board the next flight to a kayak destination of your choosing (figure 8)
0 Comments
|
AuthorHi there! Archives
February 2021
|

 RSS Feed
